

Quick answer: A washing machine filter can collect lint and small objects before they reach the drain pump, but its location and cleaning interval depend on the model. Check the manual before opening anything. If the washer has a user-serviceable drain-pump filter, switch off the appliance, protect the floor, drain the water as directed, clean the filter, refit it securely, and check for leaks.
Key Takeaways
- A full drum’s worth of water can come out. Open the filter in stages, not all at once.
- Every three to four months, or sooner if the machine drains slowly.
- Screw it back firmly. A loose filter leaks and lets debris reach the pump.
- Some machines genuinely do not have a user-accessible filter. Check the manual before hunting for one.
If you are learning how to clean a washing machine filter, first confirm that the model has a user-serviceable washer drain filter. LG, cleaning a washer drain-pump filter applies its monthly procedure to specified front-load and combo models and tells owners to drain the water before removing the filter. The exact manual controls for other machines.
Where the washing machine filter is
Filter access varies. Some front-load machines place a serviceable filter behind a lower hatch, while other washers use a different location or have no owner-serviceable filter. Find the exact procedure in the manual before opening a cover.
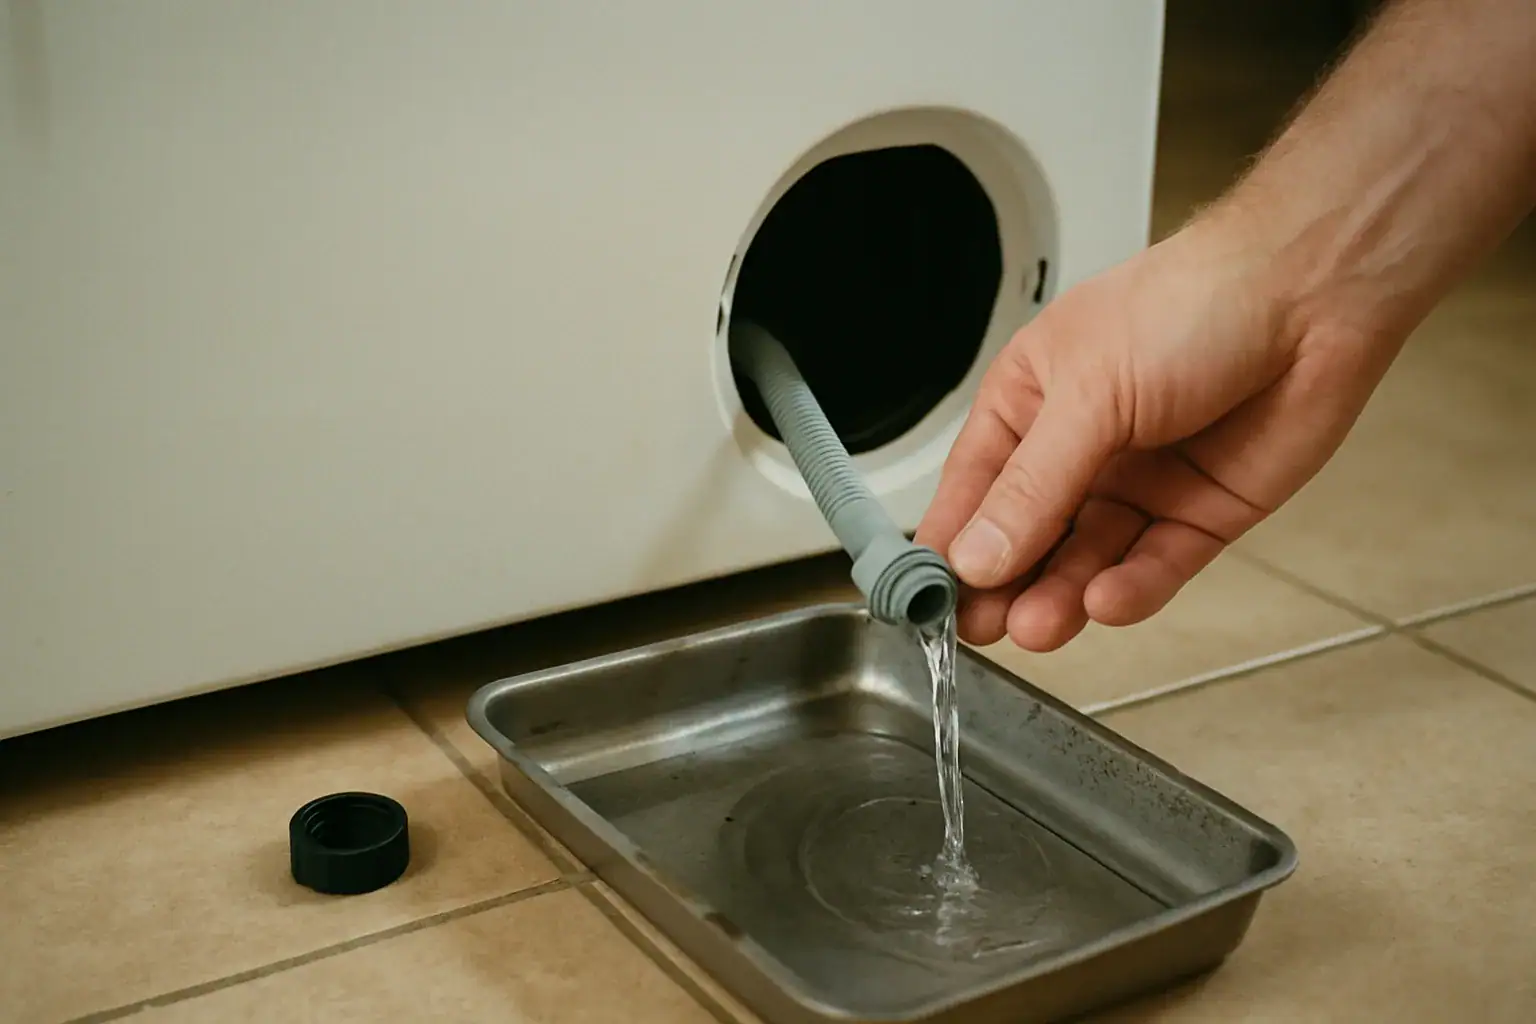
Behind it you will typically find a round filter cap with a handle or grip, and often a short flexible drain tube tucked alongside it. The tube is there specifically so you can drain the machine before opening the filter, and it is the detail that saves your floor.
Some top loaders put the filter inside the drum, under the agitator cap, and a few machines have no serviceable filter at all because they use a self-cleaning pump. If there is no hatch and the manual does not mention one, do not start removing panels to find it.
Before you open it
Switch the machine off at the wall. Not because of the filter itself, but because you do not want it starting a cycle while the pump housing is open.
Lay old towels across the floor in front of the machine and put a wide, shallow tray or a baking dish under the hatch. A tall bucket will not fit under the opening, which is the mistake most people make first.
If the drum still has water in it because the machine failed mid-cycle, expect to empty several trays. That is normal.
Doing it
If there is a small drain tube, pull it out, take off its cap, and let the water run into the tray. Cap it and empty the tray as many times as needed. This gets most of the water out before the filter comes anywhere near open.
Then turn the filter cap anticlockwise. Go slowly. Unscrew it a quarter turn, let water seep out, empty the tray, and repeat. Only take it fully out when the flow has stopped.
Pull the filter clear and look at it. Expect lint felted around the mesh, hair, coins, hairpins, buttons, and occasionally a screw or a child’s toy. Clear it all off, rinse it under a hot tap and brush the mesh.
Do not put fingers or tools into the pump housing. Remove only debris the owner’s manual says is safely accessible, and use service if glass, a seized part or an inaccessible obstruction is present.
Screw the filter back in clockwise, firmly, by hand. It needs to seat against its seal. Check the seal is clean, because grit on it is a common cause of a slow drip afterwards.
Run a rinse and spin with nothing in the machine and watch the hatch area for leaks.
How often, by situation
| Situation | Action |
|---|---|
| Routine care | Use the interval in the owner’s manual |
| Slow drainage | Check the model’s filter and hose instructions |
| Water remains in the drum | Use the documented drain procedure before opening a filter |
| No user-serviceable filter | Do not remove panels to search for one |
What people find in there
Coins, hairpins and garment hardware can reach a filter or pump area. Empty pockets and use a laundry bag for small or wired garments to reduce that risk.
A mesh laundry bag can reduce the chance that small garment hardware escapes into the washer, but it does not replace checking pockets or following garment-care instructions.
A grey felt of lint on the mesh is not a sign of neglect. It is what the filter is for.
When the filter is not the answer
If you clear the filter and the machine still will not drain, the fault has moved further along. The usual candidates are a kinked or blocked drain hose, a blocked standpipe, or a failed drain pump.
A loud buzz during the drain phase with no water moving means the pump motor is running against something jammed. Silence during the drain phase means the pump is not running at all. Both need the machine opening up, and that is the point to stop.
The full sequence is in a washing machine not draining or spinning.
Frequently asked questions
My machine does not seem to have a filter. Is that possible?
Yes. Some top loaders and a few front loaders use a self-cleaning pump with no serviceable filter. Check the manual rather than removing panels.
Can I clean it without draining first?
You can, and you will get a large amount of water across the floor. Use the drain tube if there is one, and open the cap in stages if there is not.
How tight should it go back?
Firm hand tight. Do not use tools. Too loose leaks, and overtightening can crack the housing.
It leaks a little after I put it back. What did I do wrong?
Usually grit or lint on the seal, or the filter is not seated square. Take it out, clean the seal and the housing face, and refit.
Does cleaning the filter help with smells?
Yes, significantly. Trapped debris in the filter and sump is a common source. It works best combined with the rest of the routine in how to clean a washing machine.
Where to go from here
Related: a washing machine that smells like sewer, a leaking washing machine, and five ways to avoid the most common washing machine repairs. The dishwasher has an equivalent filter that matters just as much, covered in how to clean a dishwasher.
For a pump or hose fault, book washer repair in Winnipeg.
Need a diagnosis in Winnipeg? Call (431) 813-3999 or book a visit online. Diagnosis is $95 in Winnipeg and $120 outside the city. If you approve the repair, the quoted repair price includes the diagnostic visit.


