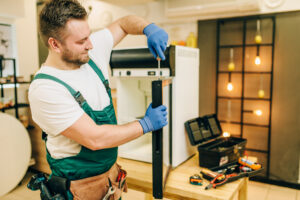
I have been a dishwasher repair man for several years and I have seen and heard it all.
This short guide will help you troubleshoot your dishwasher. There is a lot to cover so don’t worry if you don’t know what to do.
The troubleshooting method applies to most dishwashers
Step #1: Checking the electrical connections
A faulty connection may cause your dishwasher to cycle but not wash or rinse dishes.
You can check this by unplugging the appliance and checking for wet marks or corrosion on the terminals at the back of the machine.
If there are any signs of corrosion, unplugging them and cleaning them with a wire brush will do the trick.
Otherwise, try using an ohmmeter to test for continuity in both directions between each terminal and ground (the neutral).
If there is no continuity, check for bad wiring connections inside the unit.
Step #2: Inspecting the door latch
The door latch is a small piece of plastic that attaches to the dishwasher cabinet.
It engages into two holes located on either side of the dishwasher door.
If you open your dishwasher and look at the bottom of the door, you will see two holes.
The latch should fit into these holes with ease, but if it doesn’t, then something may be blocking it from entering fully.
This could be debris build up or another foreign object in front of one or both holes.
Step #3: Inspecting the drainage system
Make sure that the drainage system of your dishwasher is not blocked with food particles or lint.
If you can see any obstruction, remove it and check if your dishwasher starts working again. If this does not help you may need to call a professional for further troubleshooting.
If you have an older dishwasher, there is a good chance that the drain has been damaged over time.
This can be repaired by replacing the old drain with a new one. However, if you have a newer model, then it may be possible to simply replace it with a compatible part from another manufacturer or use a repair kit like this one, which comes with everything you need to fix the problem without having to buy a whole new unit.
Step #4: Inspecting the spray arms, filters, and hoses
Check for clogs in spray arms. If they aren’t moving freely, they may be clogged or worn out.
You can usually remove them by hand or by using pliers or an adjustable wrench. If you can’t remove them easily by hand or with pliers or an adjustable wrench, try soaking them overnight in hot water with some detergent added (this will soften any calcium deposits).
Then remove them from their mounting brackets and wipe off any residue before reinserting them into their brackets (or replacing them entirely).
Step #5: Checking for a clogged drain hose
In case you find that the drain line is blocked by some debris, then you will need to get rid of this very first.
You can do this with the help of a small screwdriver or a butter knife. After that, it is recommended that you take the time to clean out any remaining food particles left in the drain pipe.
Now, turn on both hot and cold water taps until they are turned off completely and then open up the dishwasher door.
It is also possible that there is something wrong with its impeller pump.
In such cases, it is advisable that you check whether there is any debris stuck inside this device or not.
If yes, then unplug the machine and remove all screws from its base plate in order to reach it easily.
Now clean out all dirt and debris from inside this part before replacing it back into place again properly.
Step #6: Making sure your unit is level
Making sure your dishwasher is level.
If your dishwasher isn’t level, water may leak from underneath.
The first thing you should do is check for any visible signs of water around the base of the unit or on the floor.
If there’s a lot of water, try turning off the power supply and unplugging the unit before proceeding further.
Check the leveling legs at each corner by gently pushing down on each one with a flat-head screwdriver or mallet until they hit their stops.
Remove any debris that may be blocking them from reaching their stops, then re-tighten them into place using pliers if necessary.
Make sure that all leg holes are completely in line with each other and that there aren’t any obstructions under or around the dishwasher preventing it from sitting squarely on its feet.
Step #7: Checking for leaks
If you notice water leaking from under your dishwasher or around the door, there could be several reasons why this is happening.
The first step is to find out whether or not the leak comes from inside the machine or outside of it.
If the leak is coming from inside the dishwasher, start by checking for any loose hoses or pipes that may have become disconnected from their connections or brackets on the exterior of the machine. If your model has an overflow pipe, check this connection as well.
If it looks loose or damaged, tighten it with pliers before proceeding further with troubleshooting steps below.
If the leak appears outside of your appliance, check around its base for signs of water damage such as stains on your flooring or cabinets near where you place your dishwasher when not in use (such as behind cabinets).
A little dishwasher troubleshooting can save you a lot of money on repairs.
We have covered a lot, which might seem overwhelming at first, but the bottom line is that these 7 steps will help you easily troubleshoot the most common problems with dishwashers.
And if you’re still having problems with your dishwasher, call Winnipeg appliance repair service today.


